
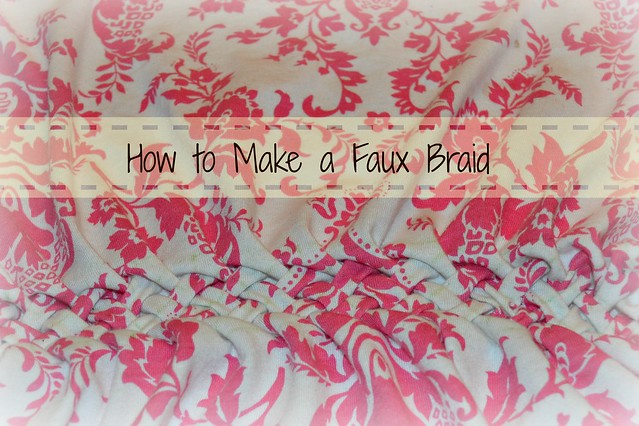
I used the technique in a dress I constructed from start to finish but it doesn't actually require a lot of sewing skill. For example, if you have a baggy t-shirt you want to give a little shape you can easily add in this braid to give it shape and interest. It's all about details!
To start you will need:
Fabric (or garment you wish to "braid")
Pencil
Ruler
Thread
Hand Needle
Scissors
Let's begin!
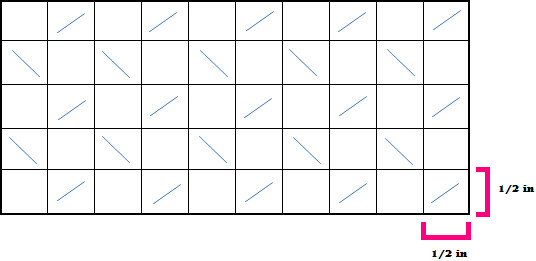
On the wrong side of your garment you will need to draw a grid just like this. For my dresses I used half inch squares. You can make bigger squares and make a bigger braid if you like, it's all up to you. Also, you can make as may rows as you like. For it to look like a real three strand braid you need to make at least five rows like I have done in this diagram here.
Also, in the diagram you see some blue diagonal lines. Draw them in this same pattern. This indicates which way you will be threading your needle through the fabric.
On your fabric it will look like this.
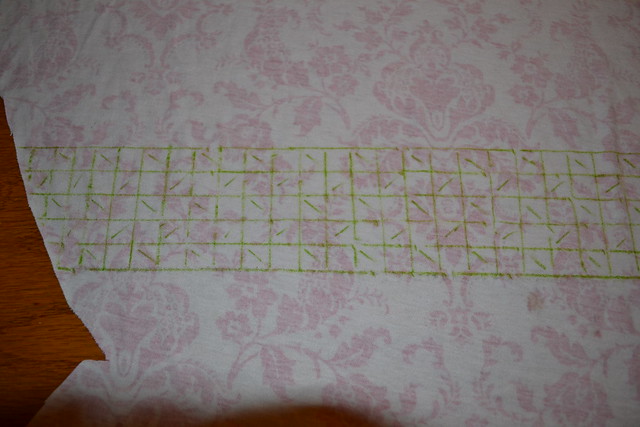
You should use pencil but for your viewing ease I used green washable marker.
I also used contrast thread for you to see more easily, but you should use matching thread. For this project I would have gone with white thread.
Once you have all that down thread your needle with a manageable length of thread and get ready to go!
Begin on the far right with the top most diagonal. Work your way down the column on the squares with diagonals and then make your way up the column directly to the left. Making sure to only go over squares with diagonals.
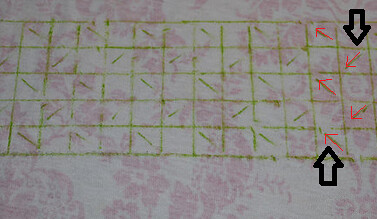
Insert your needle from top to bottom at point a. and then come up again at point b. Like this...

Do not pull thread all the way through, leave one to two inches at point a. like you see in the picture. Insert needle again from top to bottom at point c. and come up again at point d.
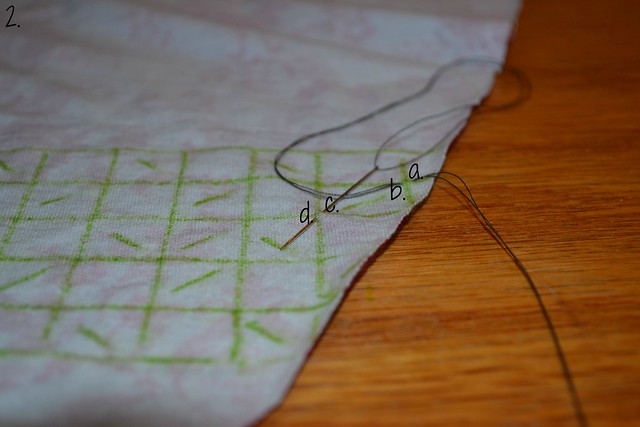
Remember, the diagonal is telling you the direction your needle needs to go.
Now gently lay your needle down. Grab the thread left near point a. with one hand and also at point d. with your other hand and pull them tight together so a. b. c. and d. are all squished together.
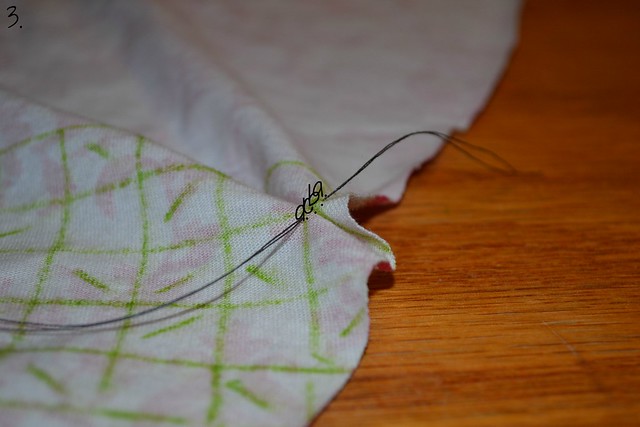
Tie a square knot and cut both ends of the thread.
You will repeat that step over and over again until you've made it all the way across your garment.
You will need to rethread your needle.
After a few knots it will look like this.
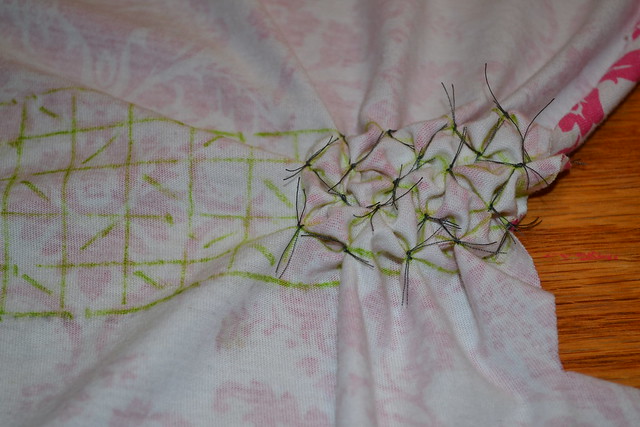
When you have made it all the way across it should look like this..

And your beautiful front will look like this..
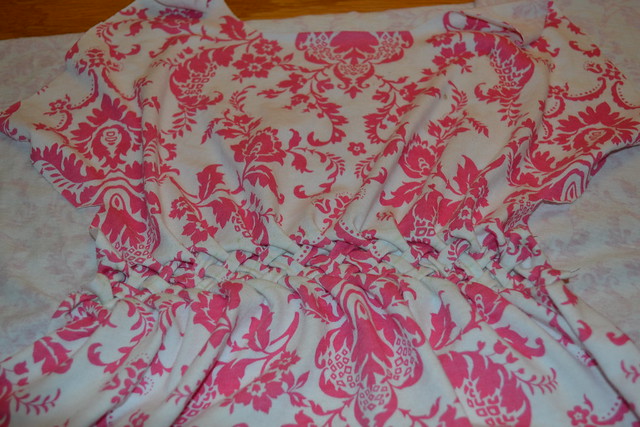
Great job! I hope this helps you add a fabulous detail to your own project. If you have further questions please ask me. If you end up making your own braid, please share a picture with me. I can't wait to see what you do with it. Happy "sewing" my friends!
How much larger should one make pattern pieces to accommodate the "braiding"?
ReplyDeleteFor my five rows of half inch squares I added two inches to the length.
Delete